Friday, September 24, 2010

H&K USP .45

The Heckler and Koch USP, short for Universal Self-loading Pistol("Universale Selbstladepistole" in German, H&K's country of origin), is used in a surprising amount of games nowadays.  Metal Gear Solid had Snake using the SOCOM, which is a USP mk23 fitted with a suppressor and LAM unit, Resident Evil 4 had Leon using a USP Tactical, Call of Duty: Modern Warfare 1 and 2 featured the USP .45, Tom Clancey's Rainbow Six Vegas 2 has the USP .40, and plenty of other game titles include this popular handgun.

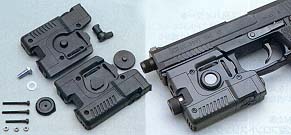
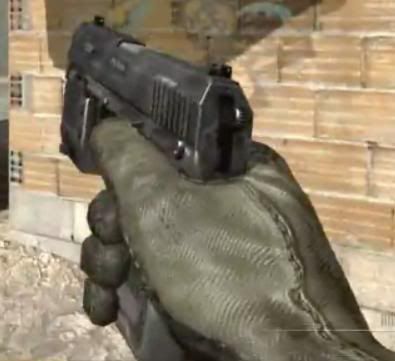
That being said, it should come as no surprise that I'd choose to build such a staple firearm.  Though there are a number of different USPs, I'm opting to build the good ol' USP .45 as you can see here:

I started this build off by printing out a 1:1 scale image of the USP, cutting it out, tracing it onto cardboard, and cutting that out.


From here, I traced several more and did something I've yet to do with a cardboard weapon; place a dowel in it:


Yes, I'm aware the barrel doesn't extend past the slide.  This technically makes it a USP Tactical, but that can still use .45 ammo, so it's all good.  I might make a suppressor for it down the road, so I figured I'd keep the option open.  After realizing all this, I decided to switch the final model over to the Tactical instead of the standard .45.

I need to add a few more details before painting, like adding the safety, the slide release, magazine release, etc, as well as drilling a hole for the muzzle.

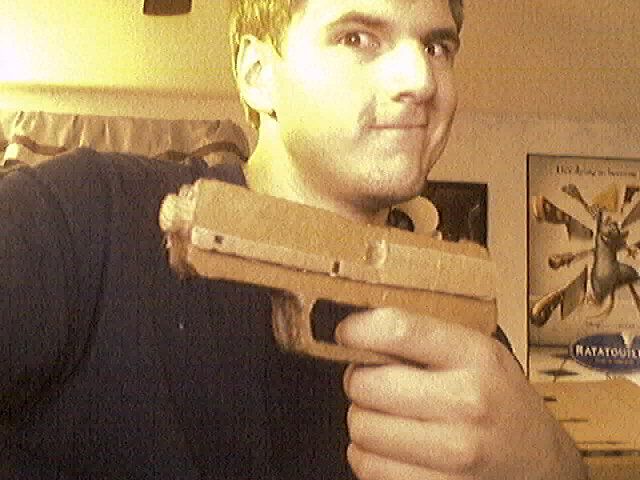
I had a surprising amount of smoothing issues when I painted it, so I worked and re-worked it until I was happy with it.  Then I hit it with a coat of black.

All that remains are the little details, which I love doing.

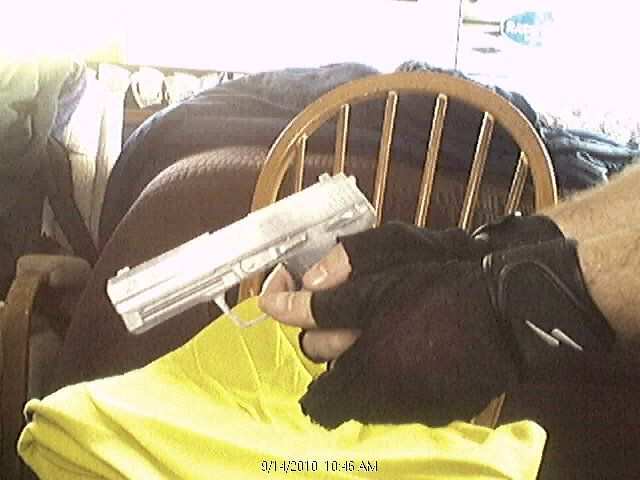
And there you have it.  A USP Tactical(albeit with the removed "USP" on the bottom of the grip, so it wouldn't clash with the Umbrella logo, as per the buyer's request) with the detailing.

Evidently my mom has decided these are dangerous because I could be shot.  It's not like I'm running around pointing these at people like a moron.  I make these for the intention of them being used at conventions for photography and the like only, which is one reason I don't bother including triggers(the other being that it's less work > .>).  Now I need to make a second one just like this.

Yay.

RPG-7

Due to Anime Central IRT(ACen's personal volunteer-driven security team) telling me my XM16E1 wasn't con-legal about a week before ACen, I scrambled like mad to throw together a mock rocket-propelled grenade, or simply RPG, as apparently a freaking rocket launcher often seen in use by terrorists is A-OK.  I didn't find out until at the convention that they deemed all cardboard weapons con-friendly.  *fist shake*

Anyway, this is what I'm building:

Just a simple series of tubes, right?  Well, yes and no.  This project gave me more grief than it should have, mostly regarding that accursed wooden...thing.

I started this out by building the rocket itself.  This was done with 1" diameter PVC and topped with two of those foam cones you find at hobby/craft stores(I think Wal-Mart even has them somewhere), and mounting them end-to-end(after shaving off the bottom to get it to proper length, of course.  I then secured the cone onto the PVC pipe by ramming it in and using hot glue.  The end was topped off with a water bottle cap.  Cardboard fins were cut out and glued around the pipe.  Afterwards, I used a spoon, I believe, to scrape in the four channels on the top cone.  The whole shebang was then painted olive drab:


For kicks and giggles, I even painted the base of the rocket a different color, even though it'd spend its life in the tube.  It made it all purdy like:


On to the launcher.  One tube wasn't long enough, so I needed two 1.25"(or possibly 1.5", I can't remember) PVC and used PVC cement to seal them together with a connector.  Over one end, I cut out a 20-oz bottle and did the same to the other end to form the base of the wooden shoulder rest.  This was covered with more plastic and melted slightly with a hair dryer to make sure it was tight.  I ran duct tape over this, made a makeshift gasket out of layers of duct tape on the inside of the front of the tube to hold the rocket in place if the launcher tipped down, and used a chunk of leftover foam for the blast cone.  This was is result:


That cursed duct tape presented me with quite the dilemma.  While it was great for forming the shape of the wooden piece, it was about the worst possible medium for holding paint.  I got around this by breaking down a cardboard wrapping paper tube and gluing three different sections(so as to retain the modular shape) of it to the tape.  When that dried, I sanded down the finish on the PVC pipe, and painted away:
Lastly, I cut rectangular holes into the bottom of the tube for the grips, which consisted of layers of cardboard sealed with paper.  I really didn't like the way the cone looked, and by complete happenstance, I was drinking out of a cup that I looked at and realized was the same diameter on the base as the PVC tube.  The result was me papier-mâchéing the cup, attaching a cardboard ring, and gluing that onto the end of the pipe.  Then, literally last minute, I built a crude scope and front sight, painted 'em up, and hopped in the car to get to the convention.  Here's the finished product:


At the convention, I had a little mishap when(I blame the lack of depth perception(eye patch), I was holding it on my shoulder, and Nick stopped in front of me.  I essentially poked him with the rocket, and the foam cone snapped.  What you see in the following pictures is actually a quick patch job with packaging tape(thank you, noble booth strangers), which I later upgraded to hot glue when I had the proper amenities in the hotel room.


With my Snake stuff:


That's my lovely girlfriend Jenn as Eva next to me.
image © Alan Hufana
It looks better with her than me. :P

I also loaned it to my friend Nick for his Chris Redfield costume from Resident Evil 5 while I lurked about as Wesker, something relevant to one of the later fights in the game:


Colt Anaconda

I really have a thing for building Colt firearms, don't I?  Well, why wouldn't I?  They're good ol' American weapons.

I digress.  This time around, I'm building Barry Burton's revolver:


You know the drill.  Find a profile, get the dimensions, size it to 1:1 in Photoshop, trace it onto cardboard, and cut it out:


After that, I traced four or so duplicates, cut them out, and glued 'em together.  For the chamber, I took a chunk of paper towel tube and filled it so it was solid:


To seal the gaps, this time around, I papier-mâchéd all the corrugations.  This expedited the whole procedure, not to mention it saved me on hot glue:

After this, all there was to do was paint on some cheap, silver acrylic for the metal and brown for the grip, and then brush in the details:

I'm not too pleased with how I left the ribs on the cardboard for the barrel there, but life goes on, and the rest of the gun is pretty decent.  I may wind up re-making this one, though I'm not sure.  This gun was built for my friend Dale.  Here he is in his Barry Burton costume, along with the rest of us in our Resident Evil get-ups:

image © DeathCom.net

Thursday, September 23, 2010

Colt XM16E1

A real XM16E1:


And the in-game model:


This is my first attempt at a larger weapon.  Anime Central was fast approaching, and I didn't want to just be another Snake with a knife and pistol, so I vowed to make his awesome early version of the M16.  So, as per usual, I found an image of a real XM16E1 from the internet, got the real-world dimensions, and sized it up to 1:1 scale in Photoshop.  Once traced onto cardboard and cut out, it looked something like this:

But what's Snake without his stealth?  I opted to add a suppressor onto it in the final version.  After building up many layers of cardboard, this is what it looked like(I apologize for the half-naked appearance.  I was working on it in my pajamas):

The barrel drooped a little bit, which I'm pretty sure was due to the way the hot glue settled on the inside.  It looks a lot more severe here than it is in real life.  Next, I had to add a few little details, like the forward assist, charging handle, and the completed frontal sight and suppressor, as well as a few minor touches, like the magazine release button.  I also corrected the barrel droop by reinforcing it with chopsticks I had lying around.  For future reference, use a dowel.  Here's the result:

Next up, smoothing all the edges out and hitting it up with some black paint:


 It's looking(and feeling) pretty darn nice.  The last thing to do is paint on the camo and add the tape.  This was done with brown and olive drab acrylic(I use the cheapest craft paint I can find from Michael's), and for the tape, I used some fabric I had left over from an older costume.  The finished result is this:

Such tactical majesty.
My camo index would skyrocket around a group of hipsters in a resale shop.  Well, my pajama bottoms would blend in, anyway...


And the prop in use at ACen '10:
 image © Alan Hufana
And later at Wizard World in 2011:

Samurai Edge Beretta M92F

I created two of these handguns, simultaneously, as it's easier, both for friends and their Resident Evil cosplays.

Here's a "real" Samurai Edge:


Yet again, I didn't document from the beginning, though I have some progress photos this time around.  I started by tracing the profile of my M92F airsoft gun onto cardboard several times.  Once I had seven of these traced, I cut the proper details into some of them, such as for the slide and sights and glued them together.  This was the result:


As you can see, the corrugations are still present, and that's the next thing to take care of, so, not having enough hot glue to do the job, I had to use Sobo glue(essentially a tacky white glue made for heavier crafts) just because I had it sitting around from school.  After which, I scraped it smooth with some scrap cardboard for a smooth finish:

This step's self-explanatory(and very, very boring):

After this, I hit both up with several coats of black acrylic paint:

And finally, my favorite part, detailing:


And done!


These were used by my friends Whitney and Nick for their Jill Valentine and Chris Redfield costumes:


I'd make one for myself, but I got my hands on a $6 plastic M92F from Wal-Mart, complete with suppressor, LED flashlight, and tactical sight, as well as with firing sounds, suppressed firing sounds, and cocking sounds.  It also blows back when the trigger is pulled.  All I had to do was re-paint it.  It's freaking awesome, so no, I won't be making one for my Wesker costume.  :P

 
Free Flash TemplatesRiad In FezFree joomla templatesAgence Web MarocMusic Videos OnlineFree Website templateswww.seodesign.usFree Wordpress Themeswww.freethemes4all.comFree Blog TemplatesLast NewsFree CMS TemplatesFree CSS TemplatesSoccer Videos OnlineFree Wordpress ThemesFree CSS Templates Dreamweaver